
Eilean Donan Castle - Work in Progress
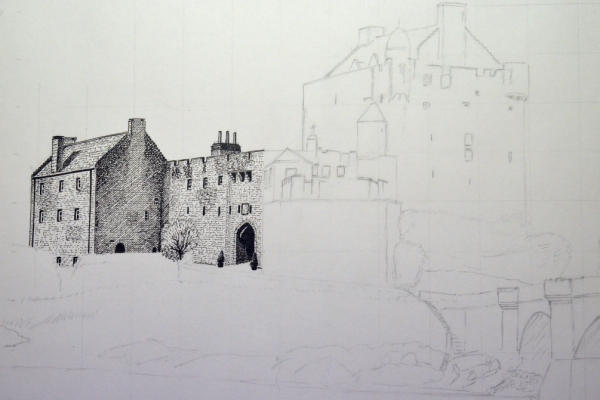
I decided to do this drawing fairly large on 16" x 12" Daler-Rowney Heavyweight paper. Using a grid for guidance, I drew out the main shapes of the buildings with a soft 2B mechanical pencil.
Working top left to bottom right I inked over the pencil lines adding in the detailed briskwork as I went.
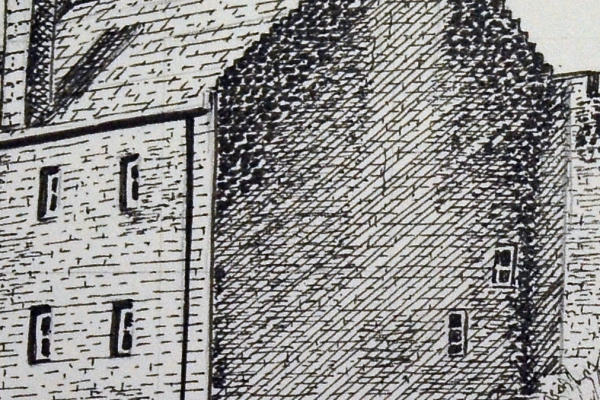
Not every brick is drawn. My method is to draw in the horizontal mortar lines using a very light pressure such that the pen 'skips' over the surface of the paper creating broken lines. Some vertical mortar lines are then added on a random basis, and only enough to create the illusion of brickwork.
The gable end of the first building is in shadow and this was achieved by diagonal hatching. In addition, the top part of the gable end was dark due to weathering, and this I achieved just by scribbling lots of ink blobs about brick size.
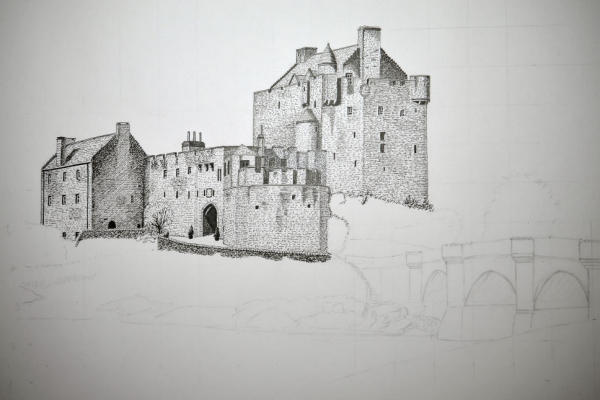
I continued working left to right, drawing in the outlines of a wall and then filling it in with brickwork. Shading and detail was applied as I worked on each section.
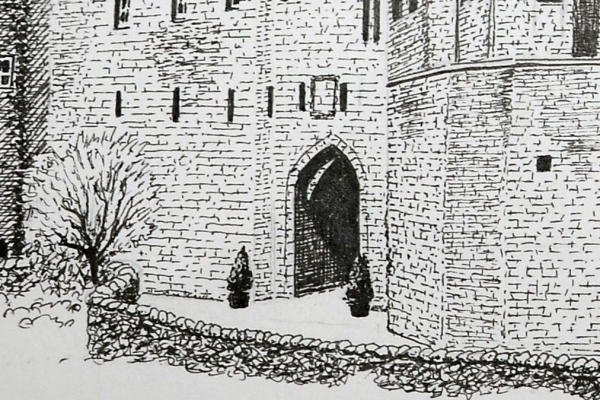
In this close up it's easy to see the random nature of the brickwork lines, and extra 'scribbles' were added where sections needed to be a tone darker.
The wall was achieved by drawing a row of rough semicircles to represent the top stones, and the body of the wall was created by 'scrimbling'. This is a technique of moving the pen in short jerky movements almost like scribbling but taking care not to over work an area, keeping the pen moving so as to create an even texture.
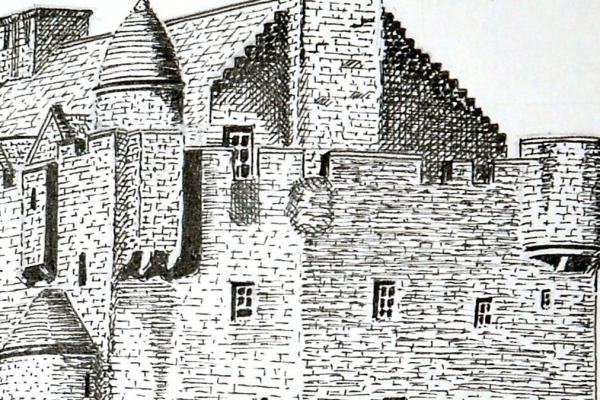
The shapes of the various towers and turrets is helped by the direction of the horizontal mortar lines, and they are given substance by extra lines depicting darker shadow area's. The very dark gable end is hatched vertically, horizontally and diagonally, with a few ink 'blobs' thrown in for good measure. It's all about using ink marks to create the required tone.
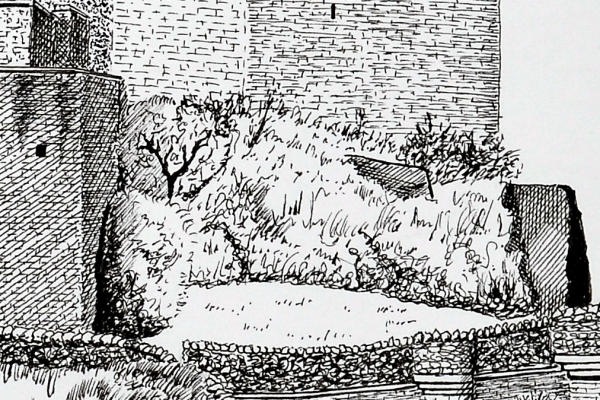
This picture shows the way I scribbled in the foliage and grass at the foot of the castle. Notice the hatching on the dark castle wall and to give the rocks some shape and form.
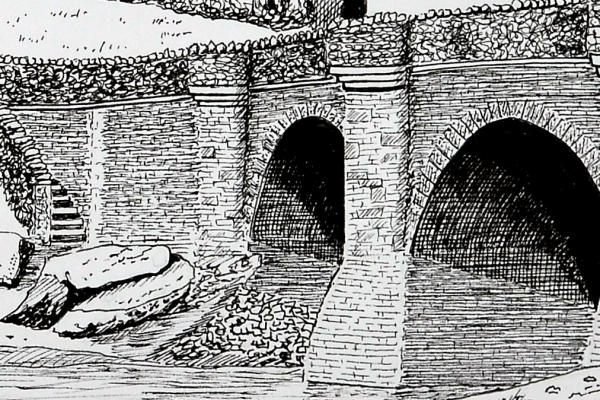
The underside of the bridge arches involved horizontal hatching, and also hatching parallel to the arch. Solid ink was used for the darkest area's. Notice how the buttresses, especially at the top, are lighter than the rest of the wall, and this was achieved with a looser scrimble.
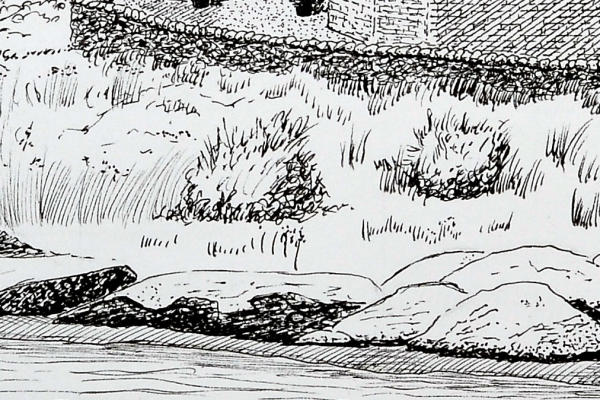
This close up shows the various ways the shoreline rocks were drawn. Simple hatching for the sand, feint lines for cracks and fissures, stippling for a grainy surface, and a mixture of hatching and scribble for the darkest tones.
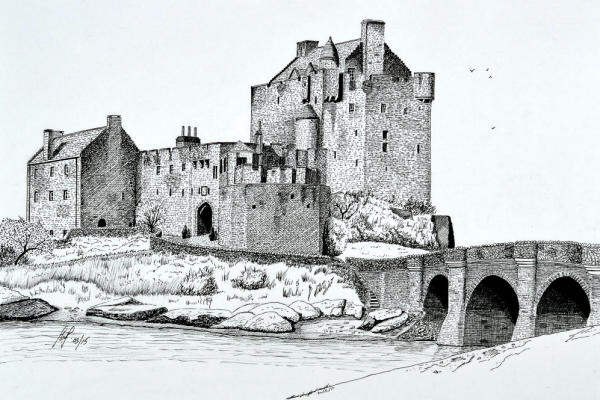
The finished picture duly signed. Regrettably the bridge causes an unbalanced scene so I added some soaring birds to the right of the main building. As usual, before declaring the picture 'finished' I worked back over it just tweaking a few of the tones here and there. It's a small extra step but one that is well worth doing.
