
Radiating Fog - Work in Progress
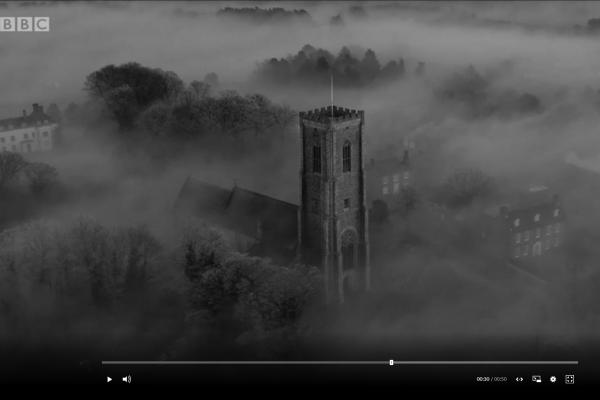
When I first saw this short piece of video I just knew I had to try and draw it. The finished drawing will never be for sale because of unquestionable copyright issues, so it is being drawn for my own personal interest and satisfaction only. Choosing a single frame from the video was difficult but this one felt as if it had a reasonable composition and would work as a drawing.
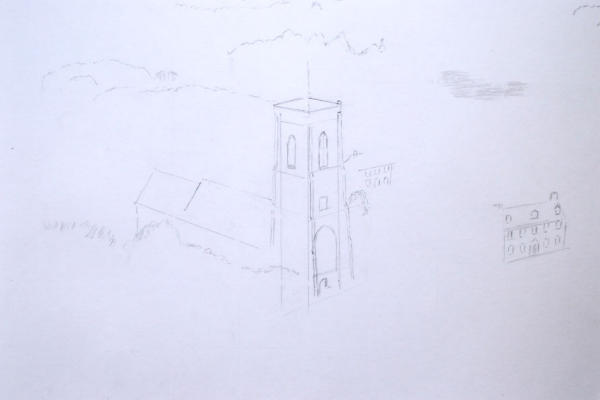
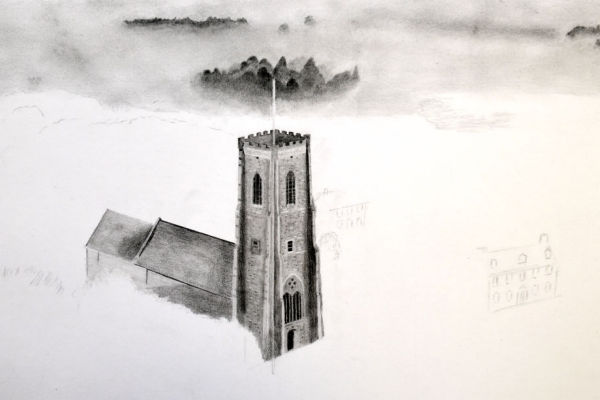
As is often the case when accurate detail is involved in a picture, I drew a suitably sized grid. This provides valuable guidance in getting size, shape, proportions and perspective as accurate as possible. I've heard many arguments about how time-consuming and fiddly drawing a grid can be but, to be honest, I've never found it takes any more than 5/10 minutes. With the grid in place (very, very lightly pencilled), I sketched in the outline of the tower, two houses and very rough marks to indicate the location of the trees.
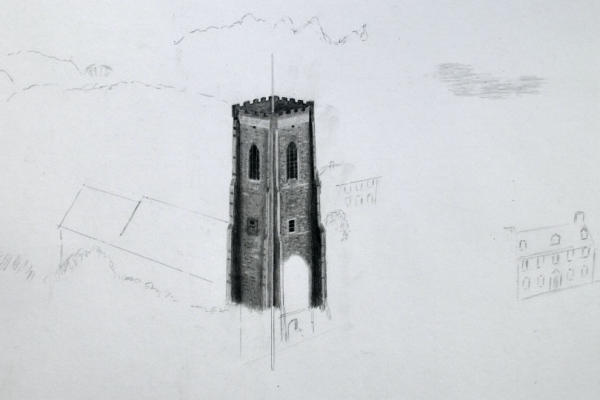
I usually work aross a drawing from left to right and top to bottom to avoid smudging the work with the drawing hand, which is also resting on a sheet of clean paper. However, on this occassion I decided to start in the centre with the Tower. I'm keen to make the tower stand out sharply from the blurry fog and mist around it and don't want to risk smudging it unnecessarily.
Once I'd shaded the sides of the tower I went over them again making darker pencil marks parallel to the ground to represent bricks. I also made a few similar lighter marks using my Mono Zero eraser to create a nice variety of brick tones.
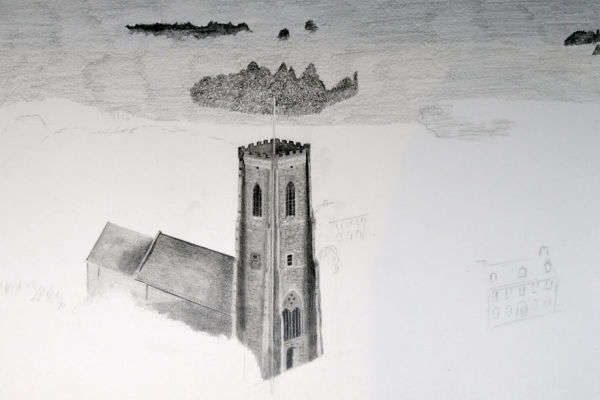
With the church building largely finished I began the background. I applied pencil roughly to a couple of the furthest wooded areas, and very roughly shaded over the upper part of the picture with the side of a pencil. This is about as course as it gets and the only objective here is to get graphite onto the paper.... the secret to the fog effect is going to be in the blending.
I used a tortillon to blend the wooded areas so I could keep the tree tops distinct, but then I worked over the rest of the graphite with a piece of kitchen paper. I worked the kitchen paper in a circling spiralling manner with my finger. The roughness of the initial shading was now causing darker and lighter areas to appear.
It was necessary to keep adding and removing graphite, blending, adding and removing, more blending, several times to keep refining the effect.

In the same way I drew in the wooded areas on the left, coursely layed down graphite around them, and then blended with tortillons and kitchen paper. A fine pencil was used to draw in the tree branches after the blending had been done. It is worth noting that some areas of graphite came out too dark when blending and this was remedied by dabbing and rolling a ball of Blu-Tac over to lift off some graphite. Again, multiple passes over the same area were necessary as the layers were built up.
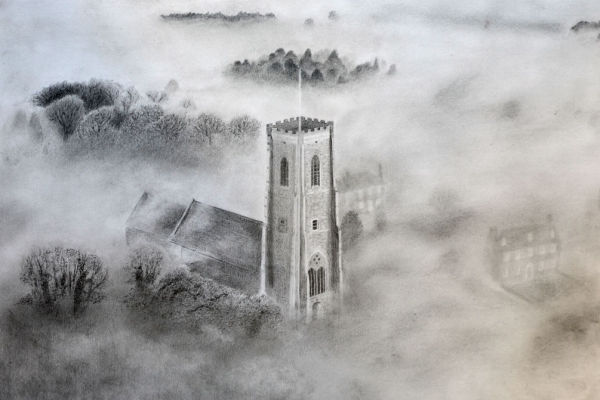
The houses to the right of the church were drawn in and again very rough side-of-pencil shading was added around them, and then the whole area was attacked with the circling kitchen-paper-covered finger.
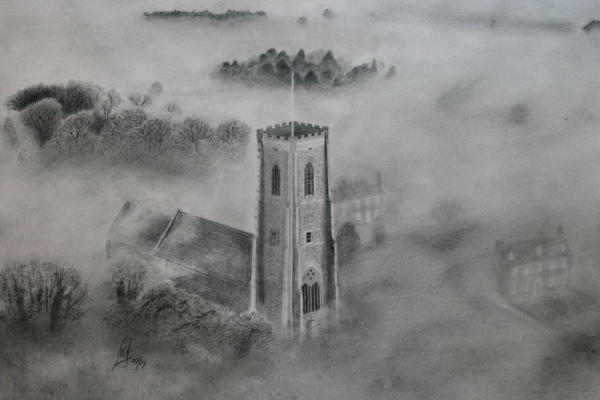
Having completed the drawing phase I now passed back over the whole picture refining it. Anything too dark was lightened with dabs of Blu-Tac, and anything too light had more graphite added. More circular blending was done to soften edges and smooth out lines in order to create the most 'misty' effect I could.
